ASN.1 C++ Toolset
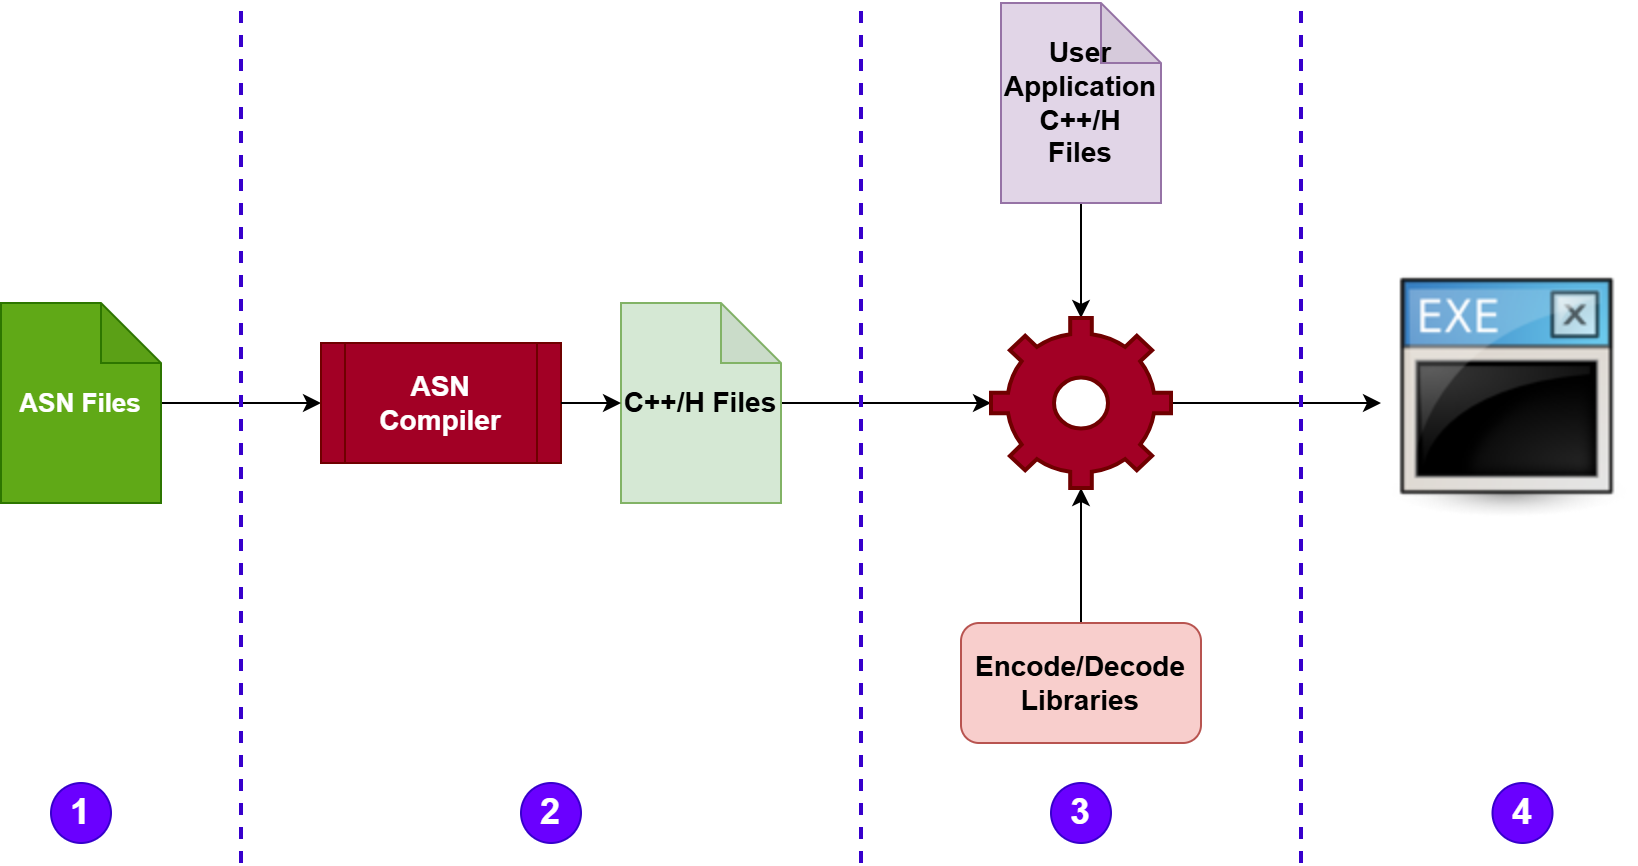
Creating an ASN.1 application is effortless with our ASN.1 C++ Toolset—just follow four simple steps.
- 1 Specify ASN.1
- 2 Compile ASN.1
- 3 Build C++
- 4 Run Executable
Step 1: Specify ASN.1
Generating an ASN.1 protocol file involves a structured process to define data structures and communication protocols in a standardized format. The first step is analyzing requirements, where you determine the data types, structures, and encoding rules needed for your application. This involves understanding the communication requirements and constraints of the system.
Next, in the ASN.1 specification collection stage, if designing a protocol from scratch, the designer shall follow the ASN.1 standards to draft the specification, defining allowed data types, constraints, and encoding rules. For protocols that have already been standardized, such as SAE J2735 for ITS/V2X communications, the ASN.1 files can be purchased from the organizations in charge.
In this end of this stage, a ASN.1 text file is generated looks like the below Foo Protocol.
FooProtocol DEFINITIONS ::= BEGIN

    FooQuestion ::= SEQUENCE {
        trackingNumber INTEGER,
        question       IA5String
    }

    FooAnswer ::= SEQUENCE {
        questionNumber INTEGER,
        answer         BOOLEAN
    }

END
Step 2: Compile ASN.1
After designing the schema, our compiler can validate it and convert the ASN.1 structures into C++ data structures while preserving semantics and following modern C++ conventions. By processing the ASN.1 files along with the specified encoding rules, the compiler generates well-structured C++ classes and structures that seamlessly integrate with modern development practices.
For instance, using the Foo Protocol example mentioned earlier, we can execute the compiler with the following command.
WTE ASN.1 Compiler
Usage: ./wte_asn [OPTIONS]

Options:
  -h,--help			Print this help message and exit
  -r,--rule			ENUM:value in {ber->0,oer->1,uper->2} REQUIRE
					Encoding rules
  -i,--input 		TEXT ... REQUIRED
					input asn.1 files
  -o,--output 		TEXT REQUIRED
					generated header file prefix name

./wte_asn -r uper -i foo.asn -o foo
Executing the above commands, the ASN.1 compiler produces three files: foo.fwd.hpp, foo.hpp, and foo.detail.hpp
Step 3: Build C++
Your application can seamlessly utilize the three interface functions provided by the generated classes and structures, which are no different from those manually written by developers:
- size_t encoded_length()
- bool encode(...)
- bool decode(...)
With your preferred C++ toolchain, you can compile and build the executable just like any other C++ project, ensuring smooth integration with your existing codebase.
Step 4: Run Executable
After debugging and testing your application, you can deploy it on various hardware platforms to seamlessly transmit and receive ASN.1-encoded messages.
Exploring the Generated FooAnswer Class
Out of curiosity, let's take a look at the generated class for FooAnswer
struct FooAnswer
{
    using QuestionNumber = ::wte_asn::Integer<kConstrainedValueRangeMinValue, kConstrainedValueRangeMaxValue, false>;
    using Answer = ::wte_asn::Boolean<>;

    QuestionNumber questionNumber;
    Answer answer;

    bool asnExtensible{false};

    size_t encoded_root_length() const noexcept;
    size_t encoded_extension_length() const noexcept;
    bool encode_root(AsnContext& context, size_t& bitCount) const noexcept;
    bool encode_extension(AsnContext& context, size_t& bitCount) const noexcept;
    bool decode_root(AsnContext& context, bool& ext) noexcept;
    bool decode_extension(AsnContext& context) noexcept;

    size_t encoded_length() const noexcept
    { return encoded_root_length() + encoded_extension_length(); }

    bool encode(AsnContext& context, size_t& bitCount) const noexcept
    {
        bitCount = 0;
        size_t bitNeeded;
        bool ret = encode_root(context, bitNeeded);
        if(!ret) return ret;
        bitCount += bitNeeded;
        ret = encode_extension(context, bitNeeded);
        bitCount += bitNeeded;
        return ret;
    }

    bool decode(AsnContext& context) noexcept
    {
        bool ext = false;
        bool ret = decode_root(context, ext);
        if(!ret) return ret;
        if(ext)
        {
            return decode_extension(context);
        }
        return true;
    }
};